Hi everyone, just a quick post today. I just finished this tutorial for my friend over at Miki's Crafty Corner for her stitch she came up with. Its only a left handed version, as I am left handed. Enjoy! The written pattern is in the information area of the video. Happy viewing everyone!

A simple blog about my craft adventures.
Saturday, 15 February 2014
Thursday, 13 February 2014
Shade Umbrella reveal!
I was thinking of putting this on my Facebook, but I thought it kinda defeats the purpose of having a blog!! So, here is my shade umbrella, inspired by The Crochet Crowd (blog post for it here.) and by using a 6.5mm hook (I think) with Red Heart Super Saver Light Blue and using this doily pattern. So, I had to learn how to actually READ the doily pattern first. That was fun due to the fact I had to read it right to left and then transfer it over so I could do it left to right. Since I have had plenty of practice doing this watching right handed videos, the transition wasn't too hard, once I learnt and remembered what all the little symbols meant. Anyway, enough rambling right? On with the pictures!!

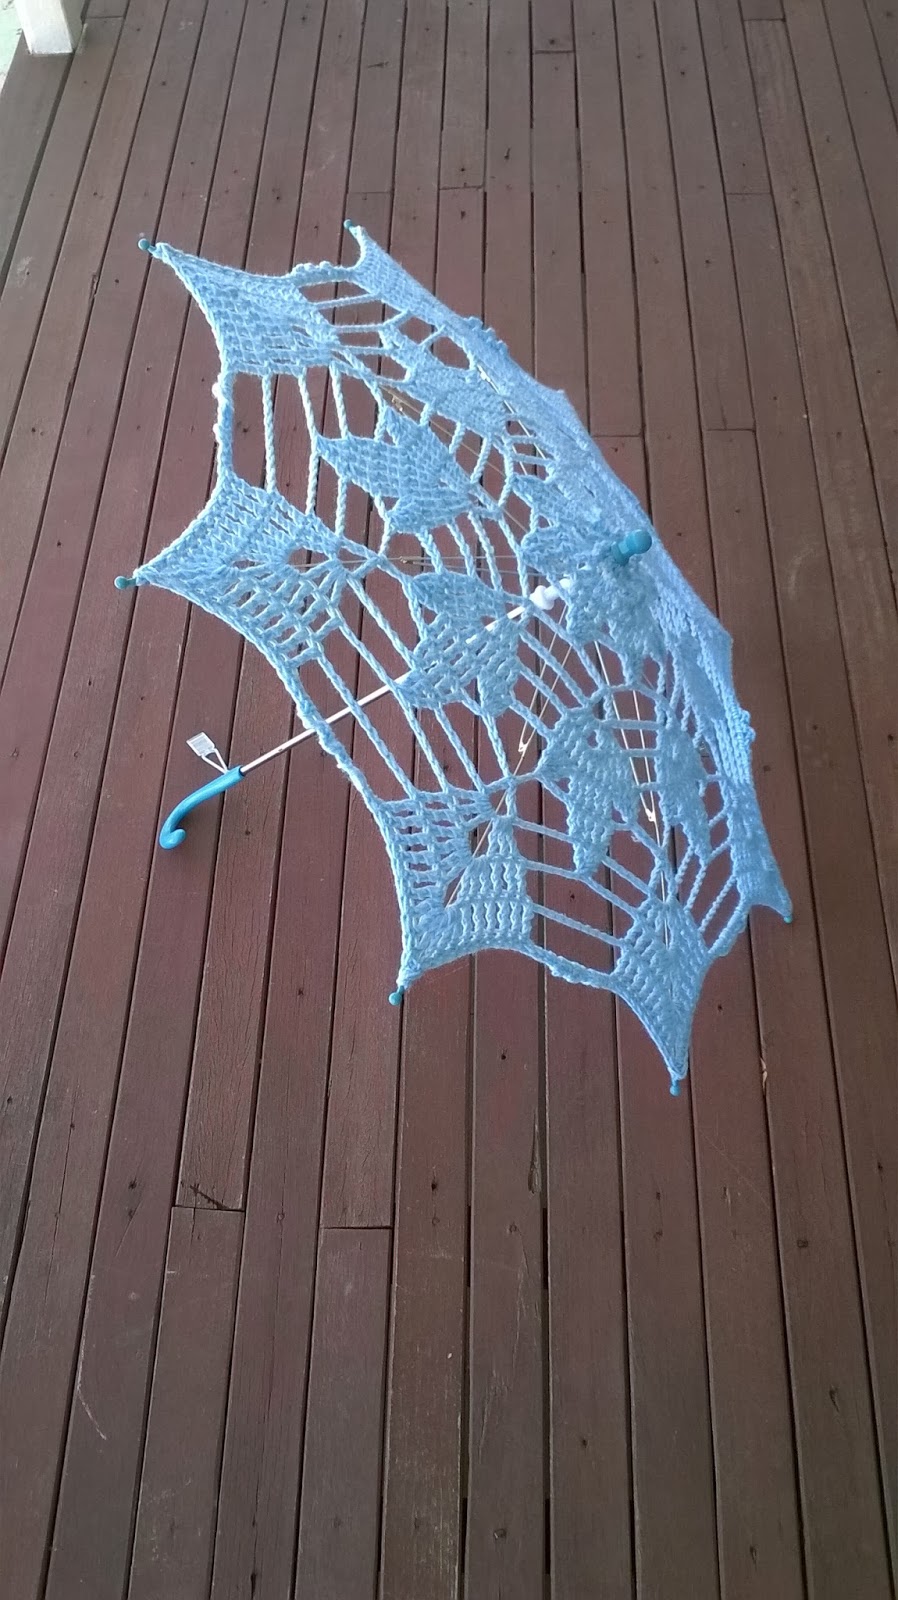


EDIT: Just quickly, while I'm thinking of it...I did modify the doily pattern so it only had 8 instead of the 12 "groups" indicated on the pattern.
EDIT: Just quickly, while I'm thinking of it...I did modify the doily pattern so it only had 8 instead of the 12 "groups" indicated on the pattern.
Thursday, 6 February 2014
A helpful tutorial.
So I'm starting off 2014 with a little tutorial. I came across this handy idea while making patterns out of books and feeling frustrated that I could never keep my place. So here is a quick tutorial that I have been planning for about a month now.
Items you will need:

First off, get yourself a small-ish magnetic white board.It needs to be magnetic. I got mine from OfficeWorks but I am sure you could find a cheap one anywhere.

Now, pull it apart...you want to separate the magnetic sheet from the border and cardboard.


This stuff on the left? Throw it in the bin...you won't be using it or needing it. You will only be needing the metal sheet on the right.
 Now, grab your cloth tape and tape around all the edges. This will stop the magnetic board from cutting into your books. Don't make the border on the front too thick as you will take away space for your magnet to stick. Cut the tape close to the edges.


And your done!! Just slip your board behind the page of a book and use your flat magnet to not only hold it to the page but also keep your place. You can add more magnets for stability. You can use it behind printed patterns as well. If you get a strong enough magnet, you can even pin a few pages to it at once. As you can see, my board isn't as long as an A4 page and its a little wide, so I do have to move it up and down occasionally.
A special thank you to my friend Jess from America for the beautiful magnet featured in this picture. I simply love it.
There you have it! I hope you find it useful!
Items you will need:
- A small magnetic whiteboard (as close to A4 as you can).
- Cloth tape
- Rectangular magnets, relatively strong.
- Other magnets (Optional)
First off, get yourself a small-ish magnetic white board.It needs to be magnetic. I got mine from OfficeWorks but I am sure you could find a cheap one anywhere.
Now, pull it apart...you want to separate the magnetic sheet from the border and cardboard.
This stuff on the left? Throw it in the bin...you won't be using it or needing it. You will only be needing the metal sheet on the right.
Now, grab your cloth tape and tape around all the edges. This will stop the magnetic board from cutting into your books. Don't make the border on the front too thick as you will take away space for your magnet to stick. Cut the tape close to the edges.And your done!! Just slip your board behind the page of a book and use your flat magnet to not only hold it to the page but also keep your place. You can add more magnets for stability. You can use it behind printed patterns as well. If you get a strong enough magnet, you can even pin a few pages to it at once. As you can see, my board isn't as long as an A4 page and its a little wide, so I do have to move it up and down occasionally.
A special thank you to my friend Jess from America for the beautiful magnet featured in this picture. I simply love it.
There you have it! I hope you find it useful!
Subscribe to:
Comments (Atom)